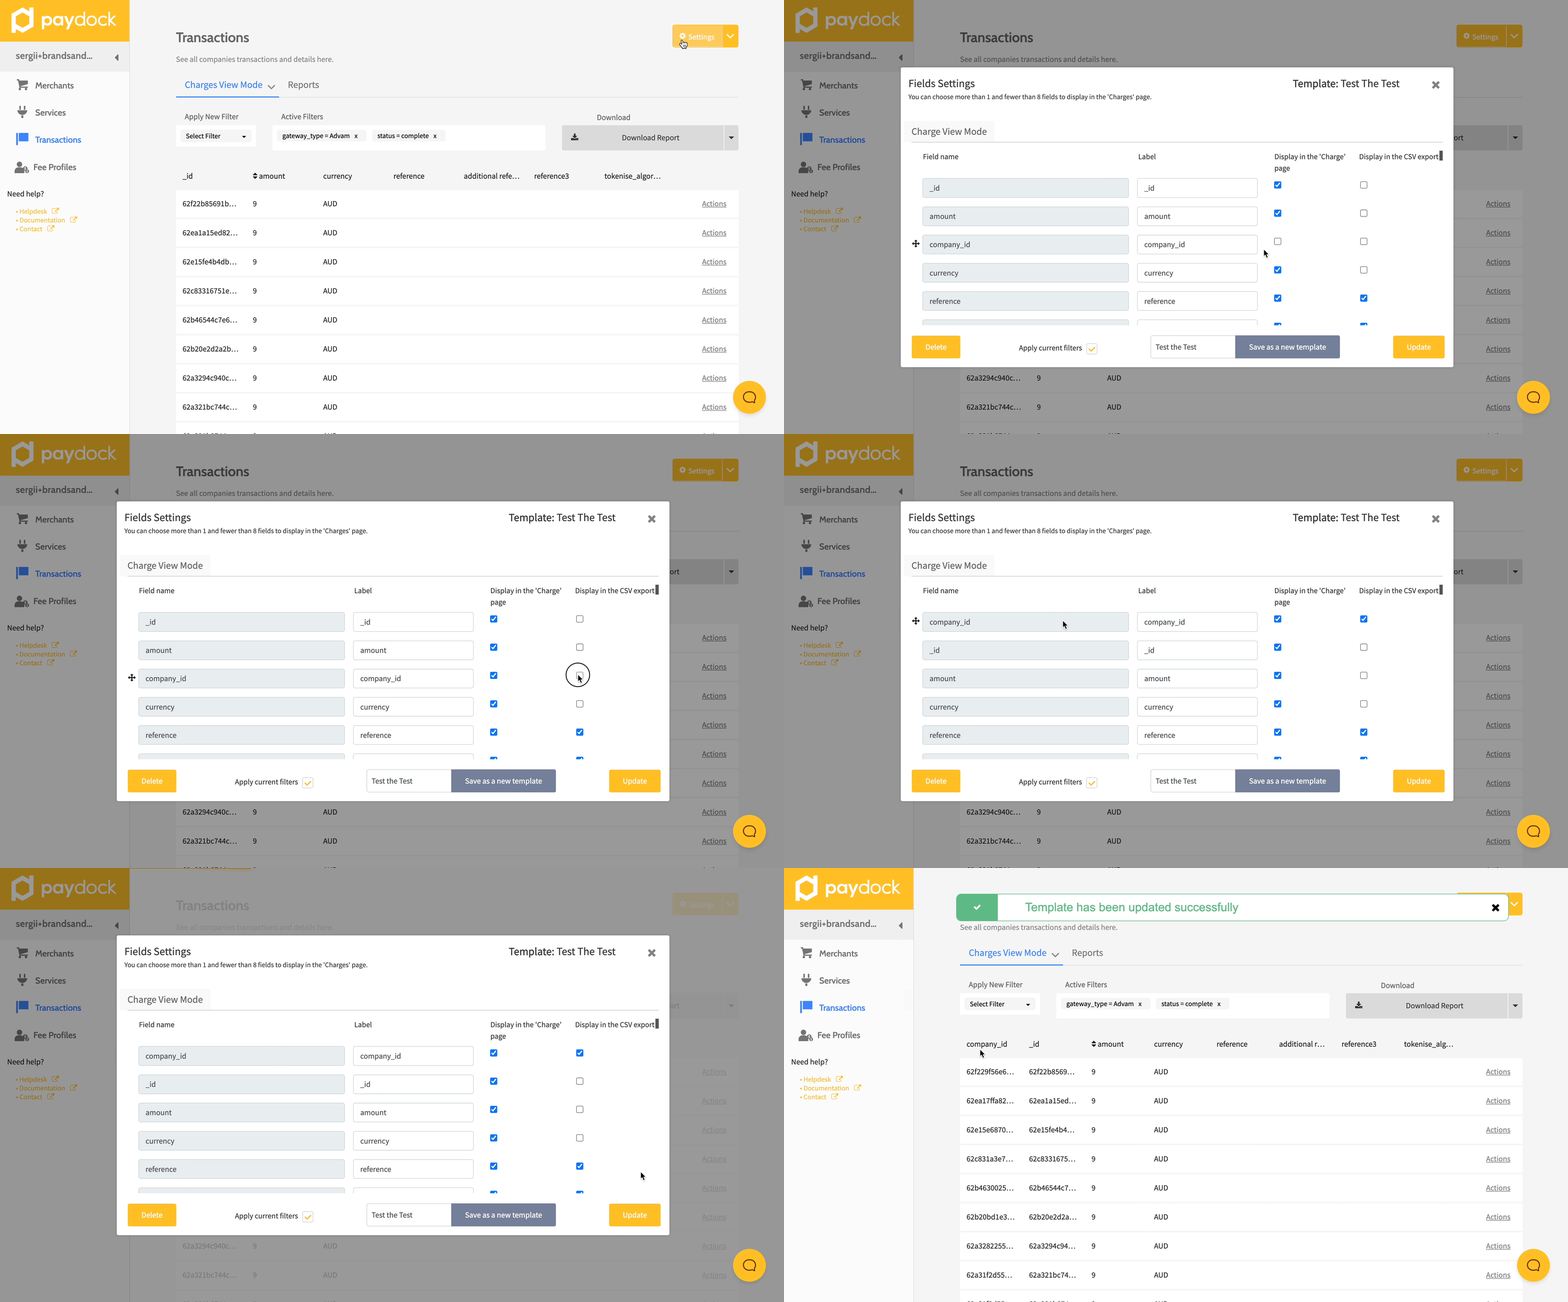
To update a Custom Brand Template:
- Go to Transactions > View Mode.
- Press the arrow next to Settings in the upper right corner.
- Choose a Template from the drop-down menu.
- Click Settings.
- Select the Fields by checking the Display in the Transactions page or Display in the CSV export. It’s optional to change Label names.
- Hover over a field and drag up or down to change the order in the template.
- Click Update.


Here are the functions for managing brand custom templates:
- Field name - predefined Charges or Txns name fields.
- Label - a custom title for the name fields.
- Display in the Charges page - add up to 8 fields to the Charges or Txns page.
- Display in the CSV export - add an unlimited number of fields to the report in CSV format.
- Delete - remove the template.
- Apply current filters - save the applied search filters to the template.
- Template name - the name of the new template.
- Save as a new template - save the changes in a new template with a new name.
- Update - edit the template.
Note: The difference between the Reference and Description fields:
- Reference field - enter a Customer, Subscription, or Transfer ID related to your internal references to find the corresponding record in your payments ecosystem.
- Description field - enter Subscription or Transfer description notes for later reference.
