
Split Payments Feature
Split Payments - it's a new technology that allows our merchants to split the amount of payment between different Vii Gift Cards and other payments methods, and combine it into one Bulk Charge. This feature also allows to utilise Fraud verification with the created charge.
To add a new Bulk Charge:
- Go to Charges > Split Payments tab > Add New.
- Under the Select Payment type drop-down list, select Pre-Auth.
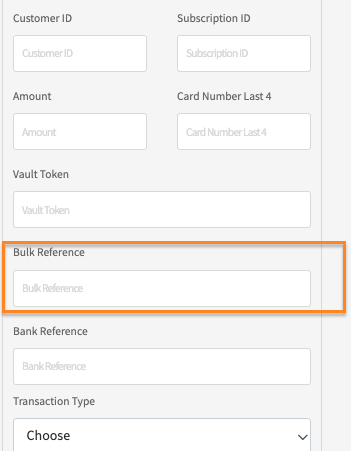
- Complete the Customer’s Personal Information, Address, Payment Details, Payment Information and Bulk Reference fields.
- Click Create Charge.
To manage Bulk Charges from the Dashboard:

To Capture the created Charge:
- Go to Charges > Split Payments tab > Search for the required Bulk Charge.
- Press Actions > Capture.
- Select the required charges (click on the All Processable Split Charges toggle to enable selecting charges separately) and press Capture.
Press Retry if needed.
It is also feasible to view and manage the charges combined into bulk separately. For this, press on Actions > View Charges. The bulk related charges will be shown in the Charges tab. It is also possible to find the bulk related charges from the Charges tab using the bulk reference filter:

To complete the Fraud check for the Bulk Charge:
- Go to Charges > Split Payments tab > Search for the required Bulk Charge.
- Press Actions > Fraud Check.
- Select the Fraud Service, required charges (click on the All Processable Split Charges toggle to enable selecting charges separately) and press Check.
- The result will be displayed.
Please Note: For the Fraud check is supported only for vault token charges with the same currency.
To Cancel (For Pre-auth charges) or Request Refund (For Captured charges) for the Bulk Charge:
- Go to Charges > Search for the required Bulk Charge.
- Press Actions > Cancel or Request Refund.
- Select the required charges (click on the All Processable Split Charges toggle to enable selecting charges separately) and press Cancel/Refund.
- Press Retry if needed.
The Get Link option enables to share the link to the Bulk Charge within the company users.
The View Logs option enables to view the logs of the Bulk Charge:

API Reference:
To create a new bulk it is necessary to send a POST request with the bulk_reference (String) ( in the request body) to the{{url}}/charges?capture=false endpoint.
- It is possible to add up to 25 charges in one bulk.
- Only pre-auth charges can be attached to the bulk entity.
- All the charges with the same
bulk_referencewill be attached into the one bulk item.
Once charges are attached to the bulk, there is the possibility to make following actions on this bulk:
- Capture -> POST
/v1/bulk-charges/{BULK_ID}/captureorbulk-charges/{BULK_REFERENCE}/capture - Cancel -> POST
/v1/bulk-charges/{BULK_ID}/cancel or bulk-charges/{BULK_REFERENCE}/cancel - Refund -> POST
/v1/bulk-charges/{BULK_ID}/refund or bulk-charges/{BULK_REFERENCE}/refund
Once such a request is sent, all charges within this bulk will be captured/canceled/refunded accordingly. It is also possible to make an action on some specific charges from the bulk. To do so, it is just required to specify the charge IDs in the body of the request
Request body example:
{
"charges": [
{ "id": "charge_id" },
{ "id": "charge_id" },
{ "id": "charge_id" },
]
}
Additionally, it is possible to get the information about a particular bulk by sending GET request to /v1/bulk-charges/{BULK_ID} or /v1/bulk-charges/{BULK_REFERENCE}
If a user wants to use unsupported symbols within the bulk_reference field, it is required to encode them (to make them supportable for URLs).