Rules
How to Add Rules and Manage Rules.
Add Rules
Smart Routing lets you define custom rules. These routing rules automatically select Payment Service Providers for the transactions that meet the criteria and filters you’ve applied. A truly 'hands-off' experience which operates on a cascading basis to allow for rule preference setting. Companies can prioritise specific payment methods, currencies or card schemes over others, e.g. less expensive cross-border payments, lower-friction Customer experience or higher success rates. If the payment fails for some reason other than a lack of funds, then the transaction will automatically be re-sent to another acquiring bank.
Add a new Rule
(for Routing) The first created Rule defines the final Gateway and payment flow. Its default status is Active, but subsequent Routing Rules should be activated manually.
(for Reject) Before sending a request to the Gateway, the Charge is rejected. The default status of any created Reject Rules is Inactive. Therefore, manual activation is required.
(for both) Before setting up a new Rule, please ensure that the Payment Service you select supports the currency, payment source type, or card scheme.
Keep in mind:
With regards to priorities, ‘Charge Reject’ routing is checked first and then ‘Routing’ so before routing any transaction the ‘Charge Reject’ rules are checked and applied.
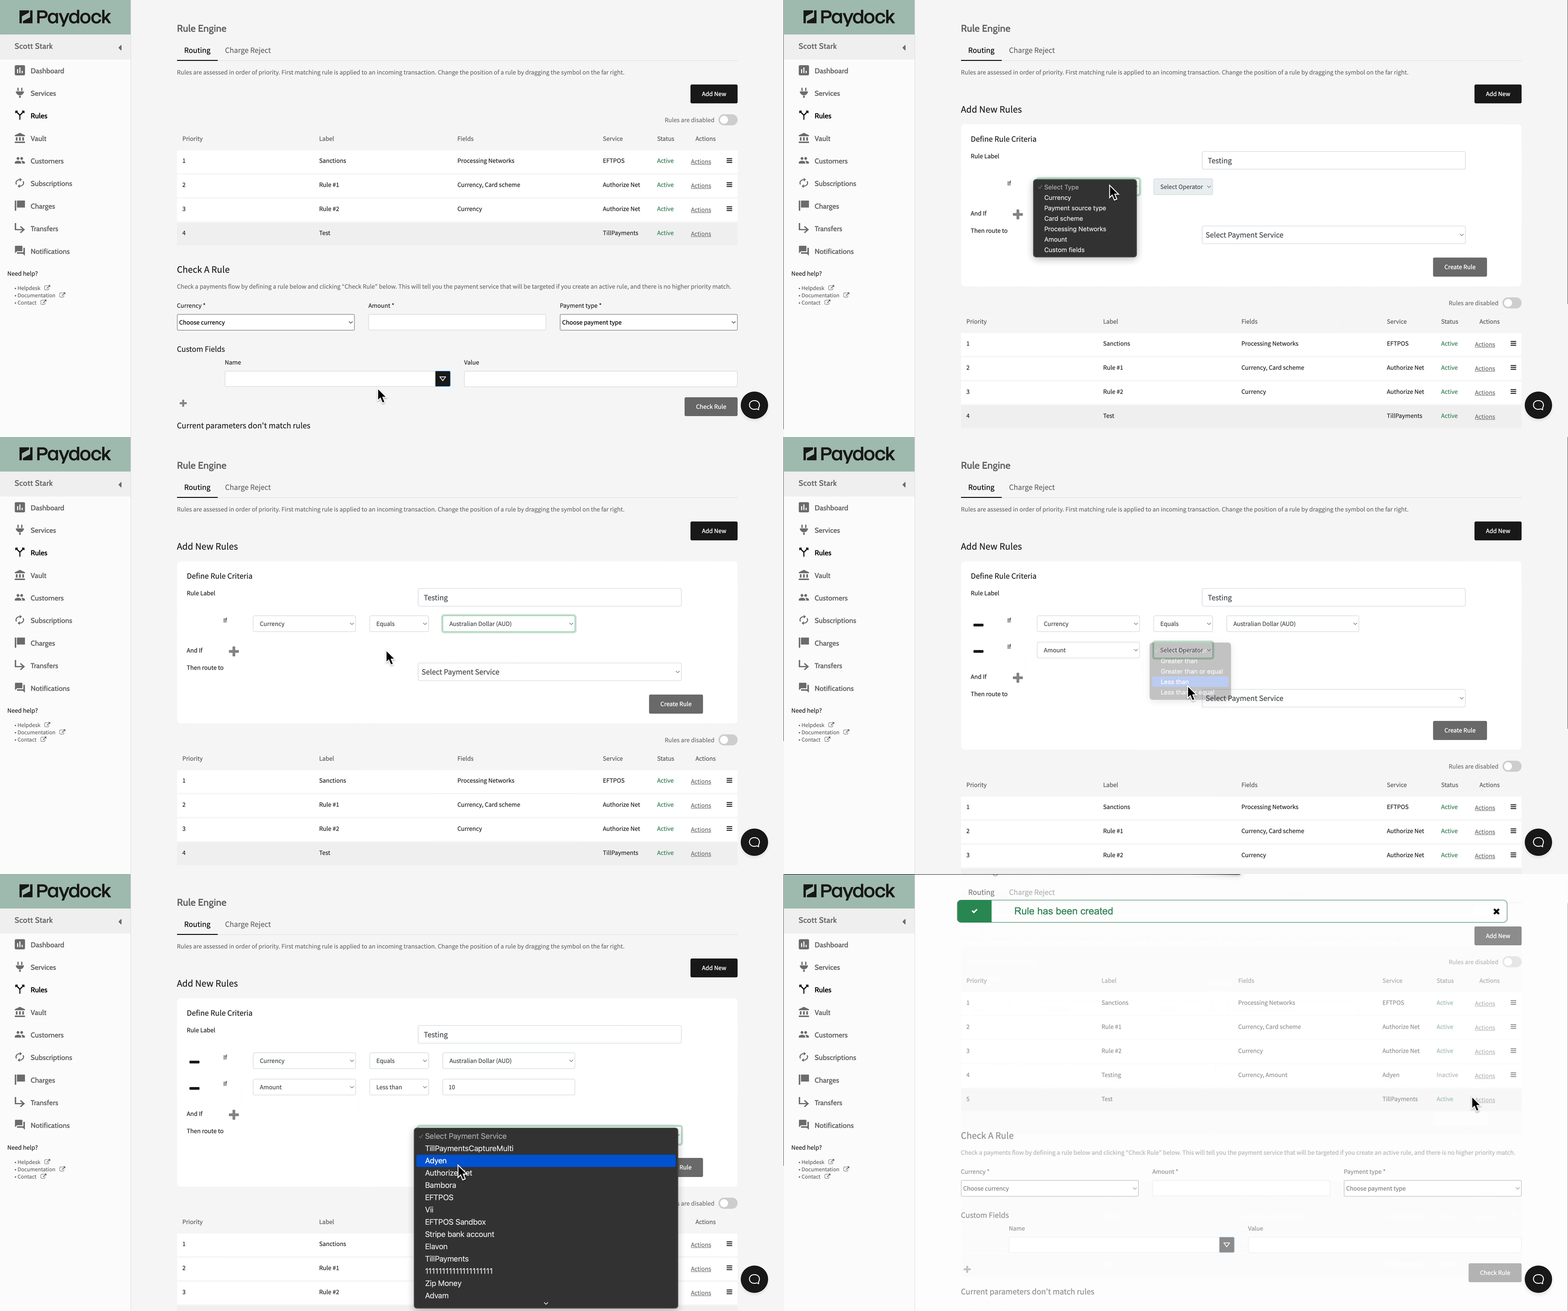
To add a Rule, follow these steps:
- Go to Rules > Routing or Charge Reject.
- Click on Add New.
- Create a name in the Rule Label.
- Select the Rule Type by choosing between
- (for Routing) Currency, Payment Source Type, Card Scheme, Amount, and Custom Fields
- (for Reject) Currency, Payment Source Type, Card Scheme, Amount, Custom Fields, Address County, and PAN
- Choose an Operator from the ones described below:
- (for Routing) Equals: the Rule applies to one option
- (for Routing) Does not equal: the Rule doesn't apply to one option
- (for both) In: the Rule applies for several options.
- (for both) Not in: the Rule doesn't apply to several options.
- (for both) Greater than: if the indicated amount is less than the Charged amount, the Charge itself will be rejected(Reject) or won’t satisfy the condition (Routing)- for the amount only.
- (for both) Greater than or equal: if the indicated amount is equal to or less than the Charged amount, the Charge itself will be rejected (Reject) or won’t satisfy the condition (Routing)- for the amount only.
- (for both) Less than: if the indicated amount is greater than the set amount, the payment will be rejected(Reject) or won’t satisfy the condition (Routing)- for the amount only.
- (for both) Less than or equal:if the indicated amount is equal to or greater than the Charged amount, the Charge itself will be rejected (Reject) or won’t satisfy the condition (Routing)- for the amount only.
- Indicate the below:
- (for Routing) Payment Service for the Routing.
- (for Reject) Reason for Rejection of the Charge.
- Click on the Create Rule.
Note: To block a card, use the PAN option under Reject Rule. It will reject a charge from the card before sending a request to the Gateway.
Activate Rules
To activate an existing Rule:
- Go to Rules > Routing or Charge Reject.
- Click on the Actions > Activate Rule for the specified Rule.
Note: (for Reject) Do not forget to Activate the Reject Rule as it's created Inactive by default.
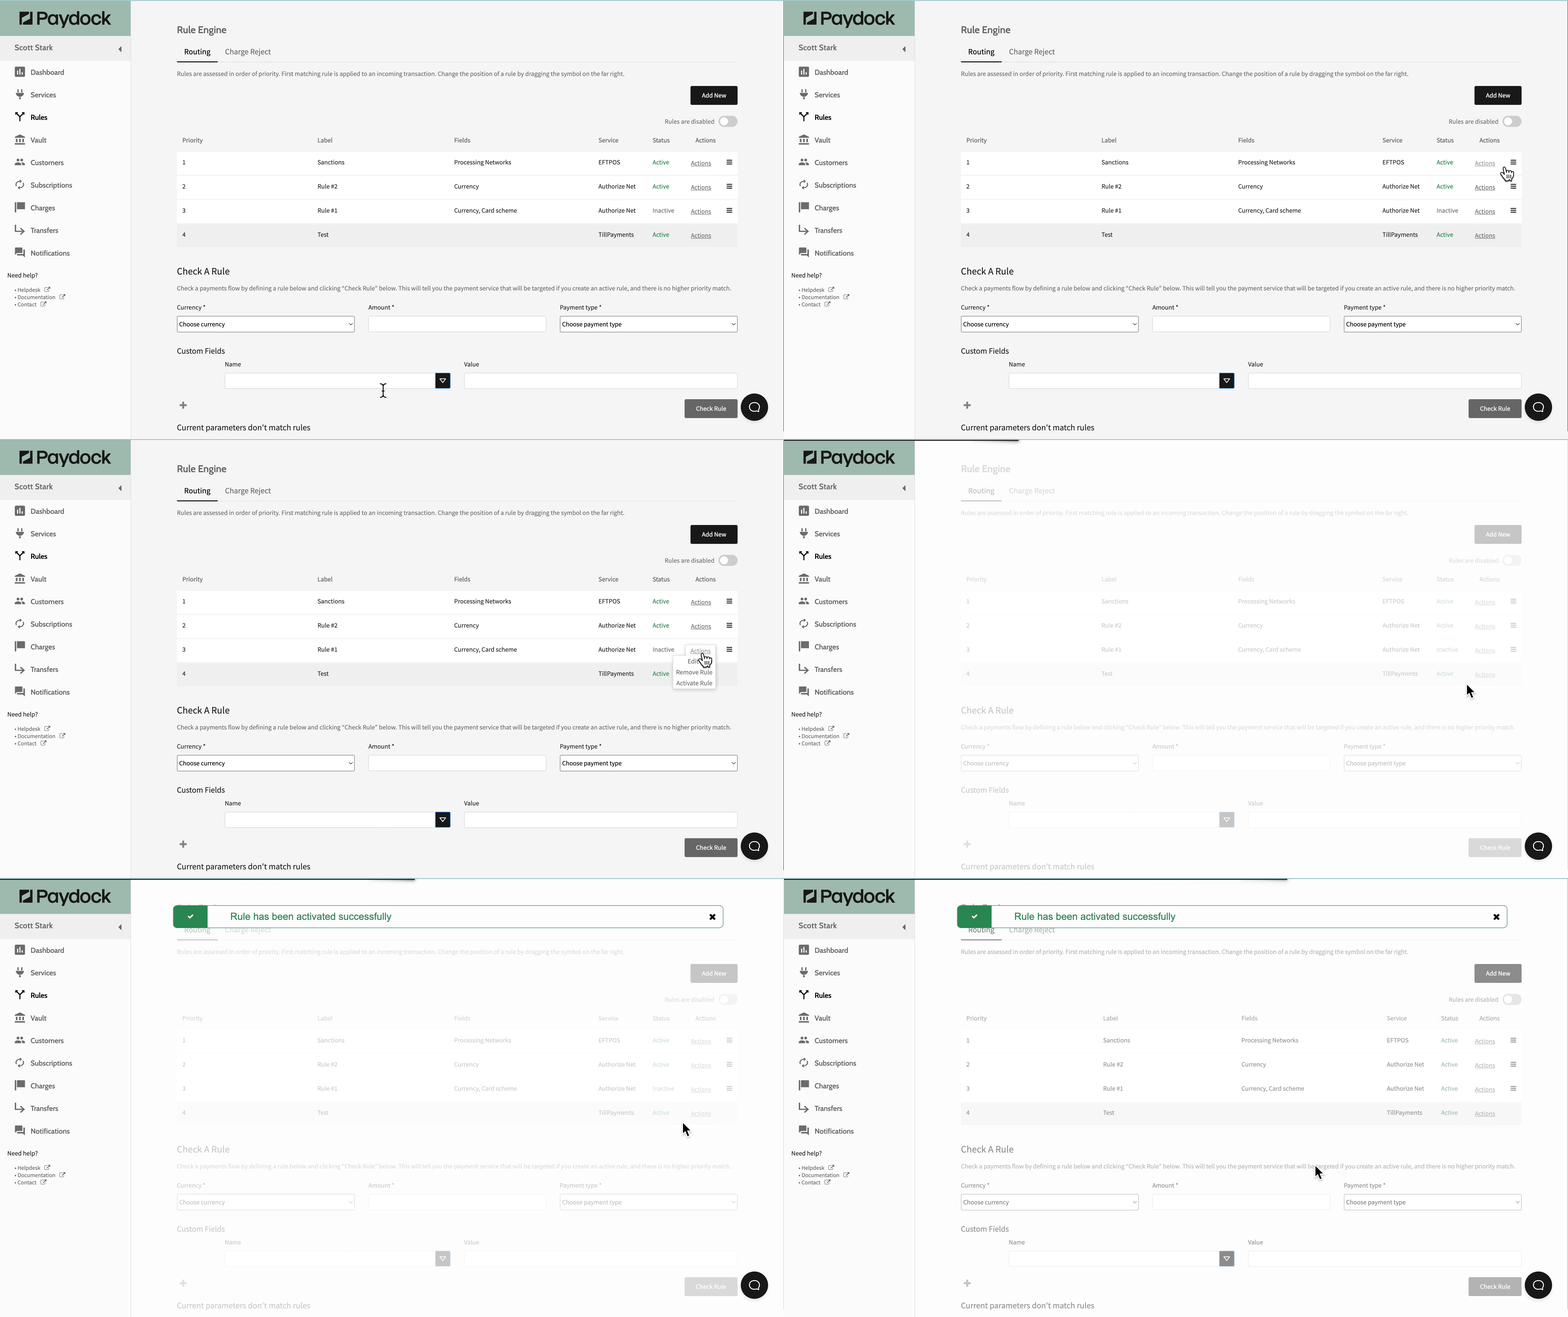
Note: (for Routing) Do not forget to click on the Rules are disabled toggle in the upper right corner to activate the Routing Rules as all are initially disabled.

Edit Rules
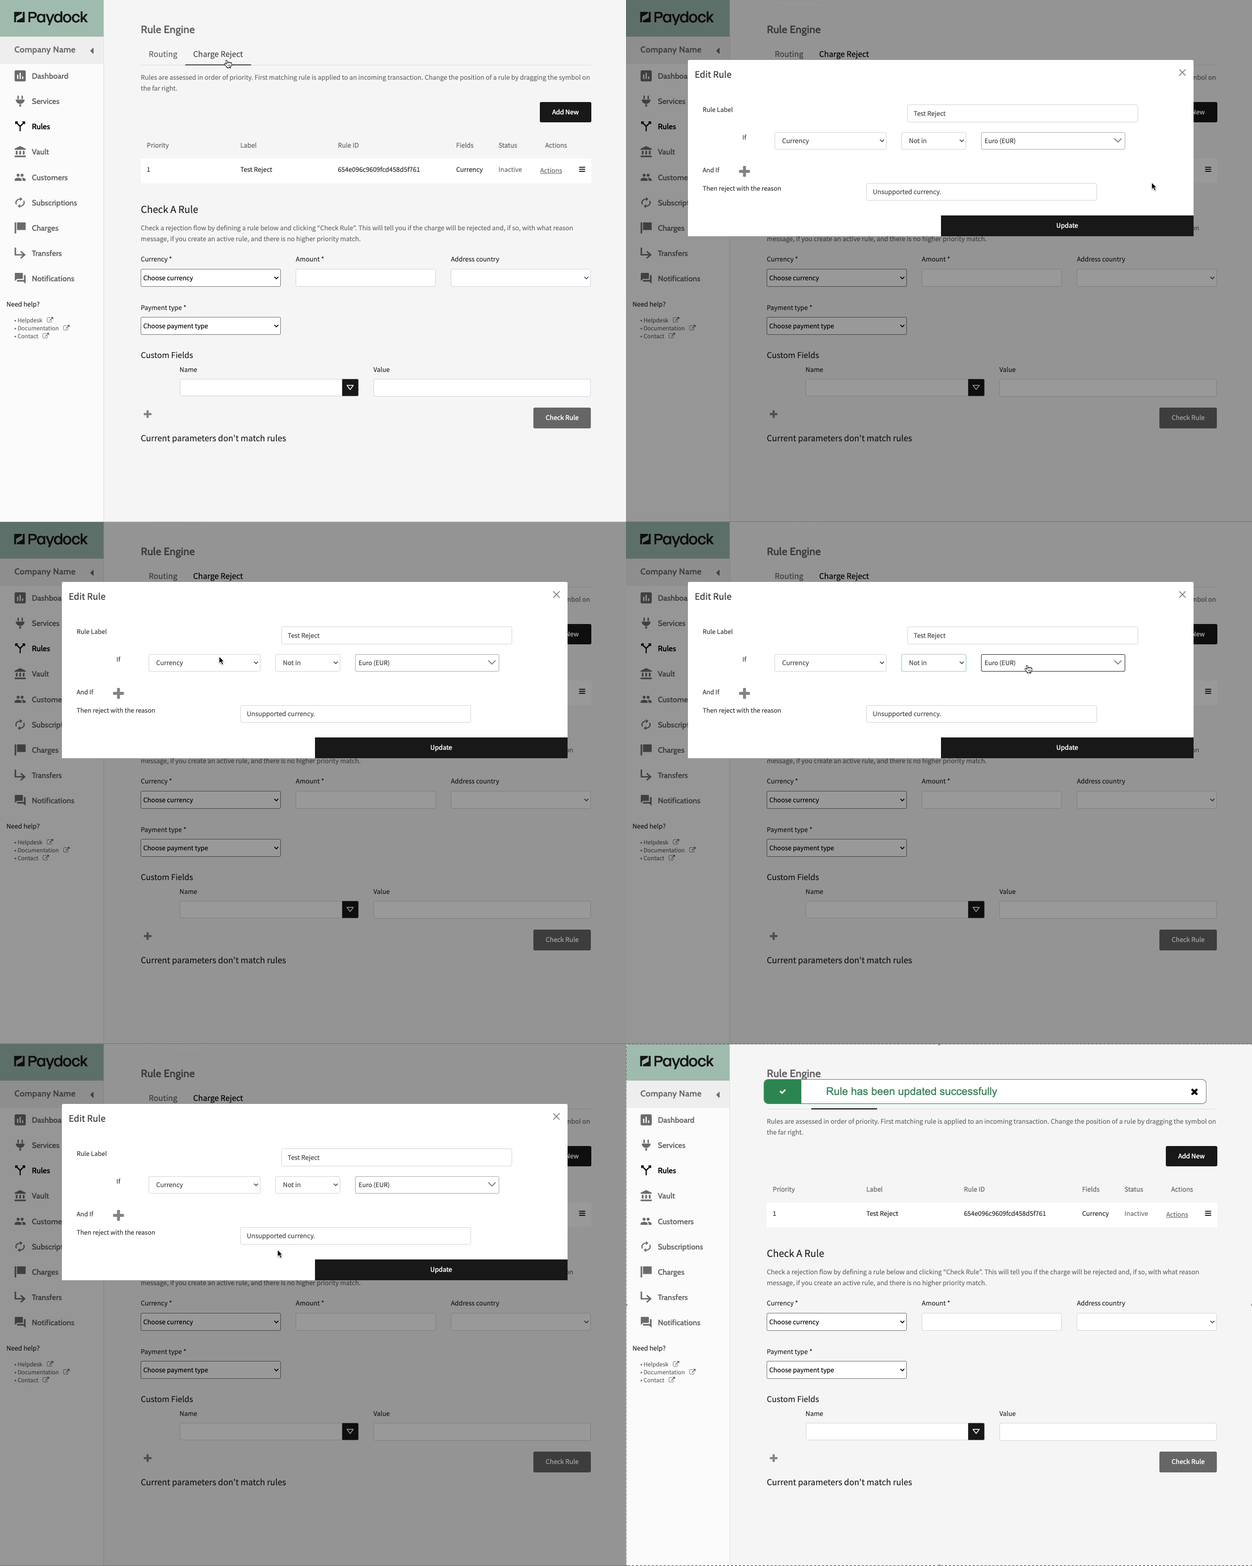
To edit a Rule:
- Go to Rules > Routing or Charge Reject > Actions > Edit the specified Rule.
- Confirm with Update.
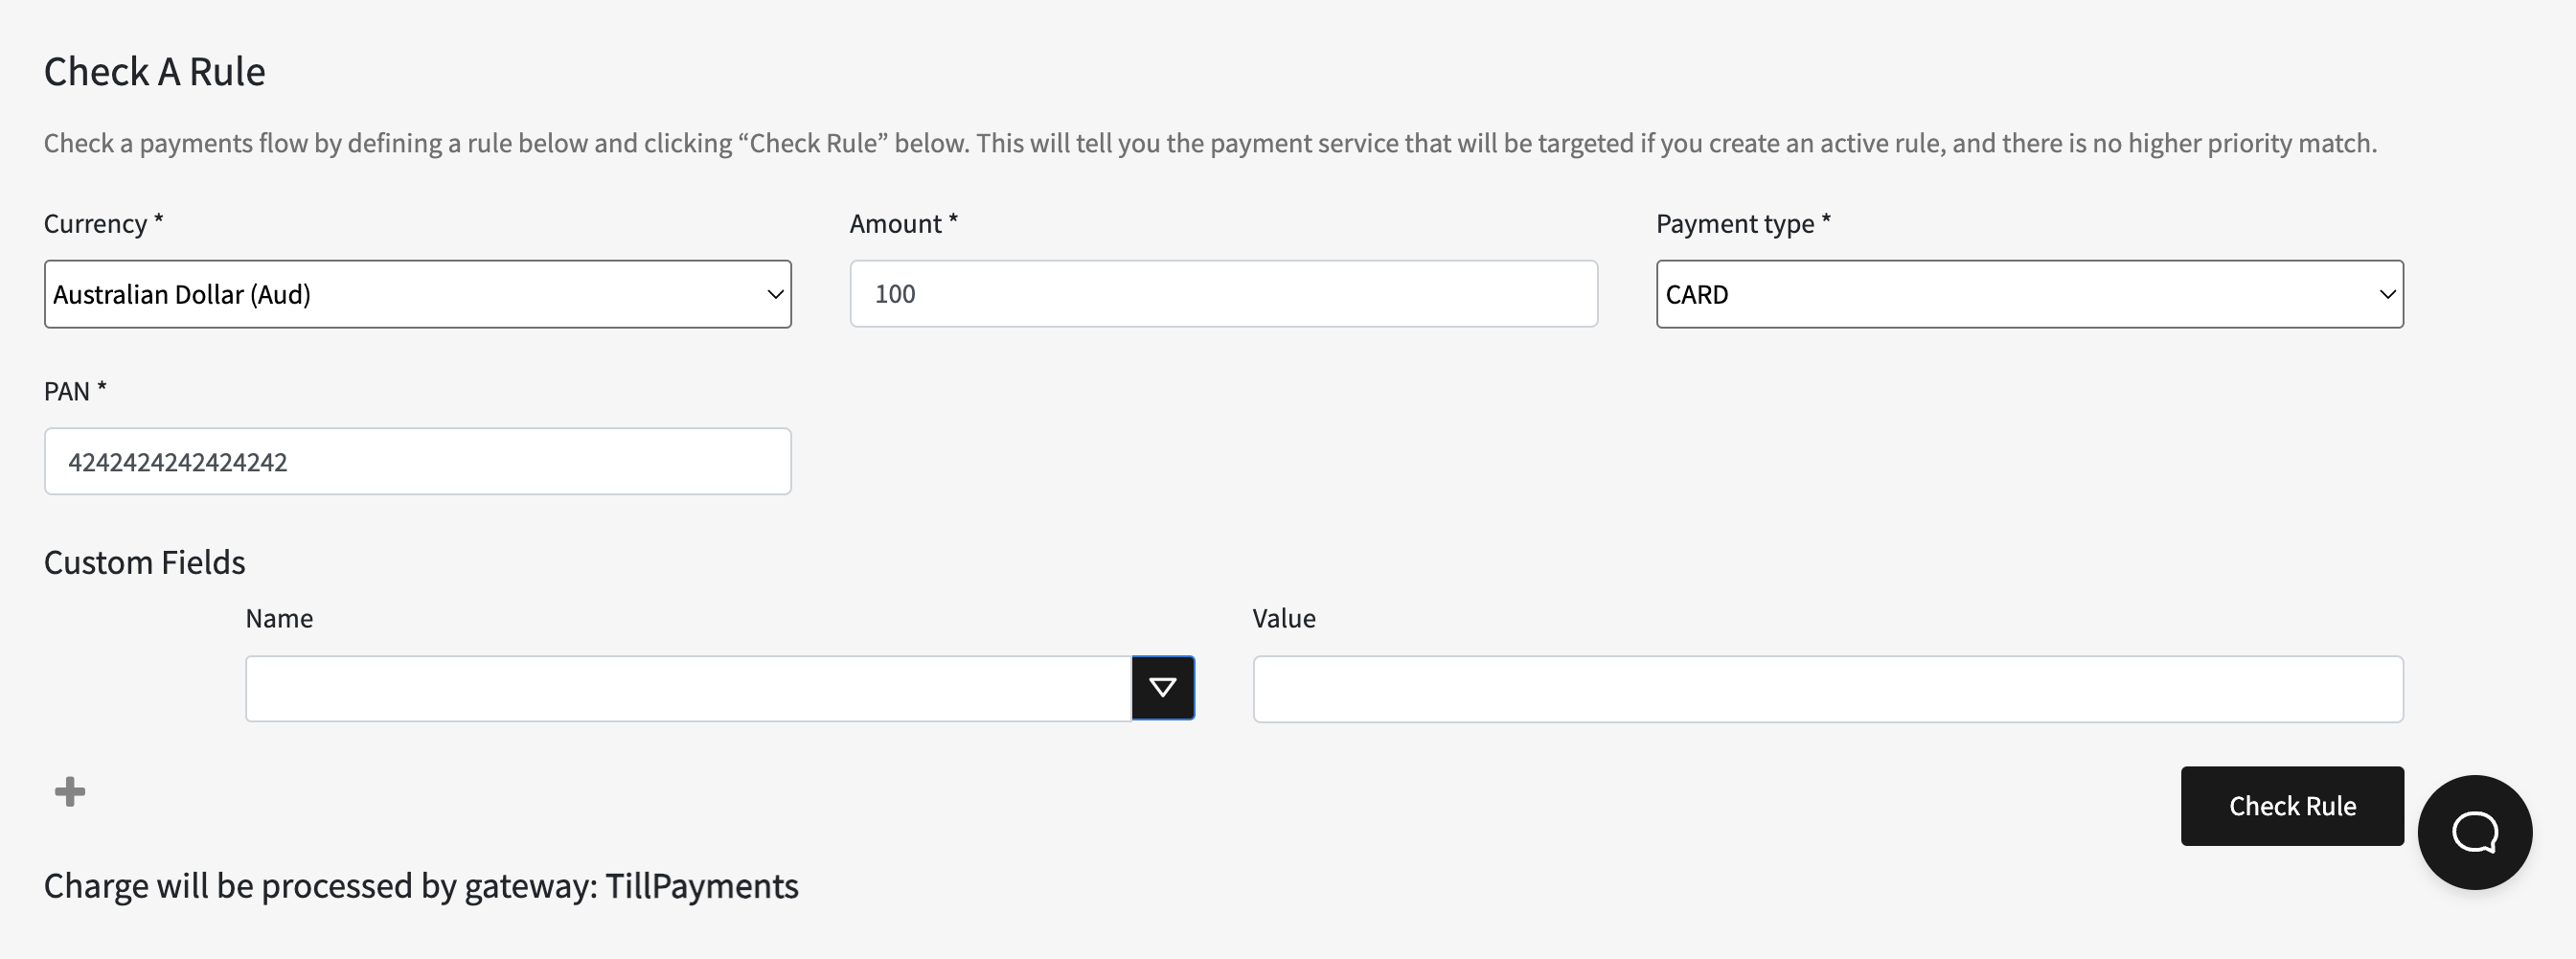
Check Rules
To test a Rule before enabling it:
- Go to Rules > Routing or Charge Reject > Check A Rule section.
- Choose Currency, Amount, Payment type, PAN (for Card), Address country (optional for Reject) and Custom Fields (optional for Reject).
- Click Check Rule and view the result on the screen.
Go to timestamp 1:45 in the video.
Priority of Rules
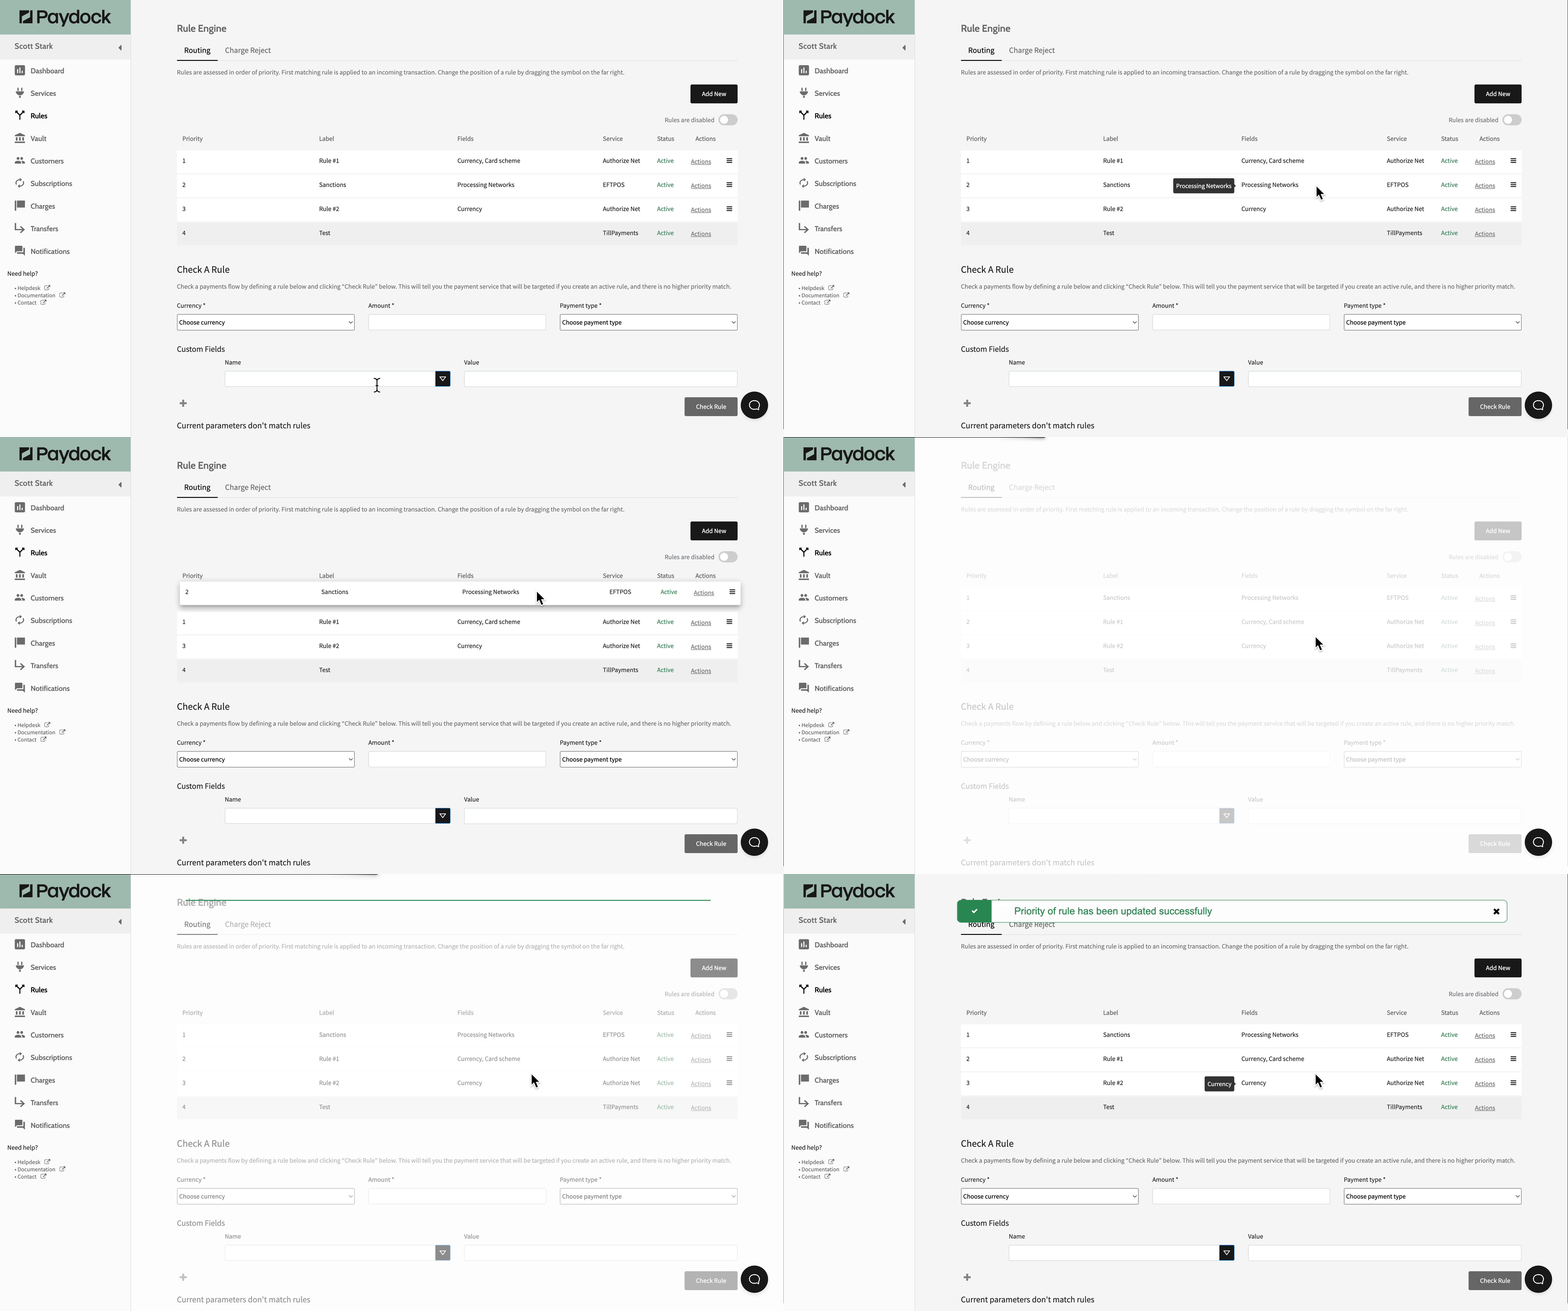
Smart routing processes payments when the charge meets the first Rule's criteria. If the requirement is unfulfilled, the prioritisation feature attempts the processing according to the second rule. The engine will continue to apply the same logic in descending order. Nevertheless, keep in mind that the ‘Charge Reject’ routing is checked first. The ‘Routing’ will be checked after so before routing any transaction the ‘Charge Reject’ rules are checked and applied.
To change the prioritisation of multiple Rules:
- Go to Rules > Routing or Charge Reject.
- Hover over a Rule and drag it up or down to change the processing order.
Note: The default Payment Gateway for the entire account under Services overrides the Rules part of the account. Paydock will channel all Charges to the default Gateway unless there is an issue with that Service.
Deactivate Rules
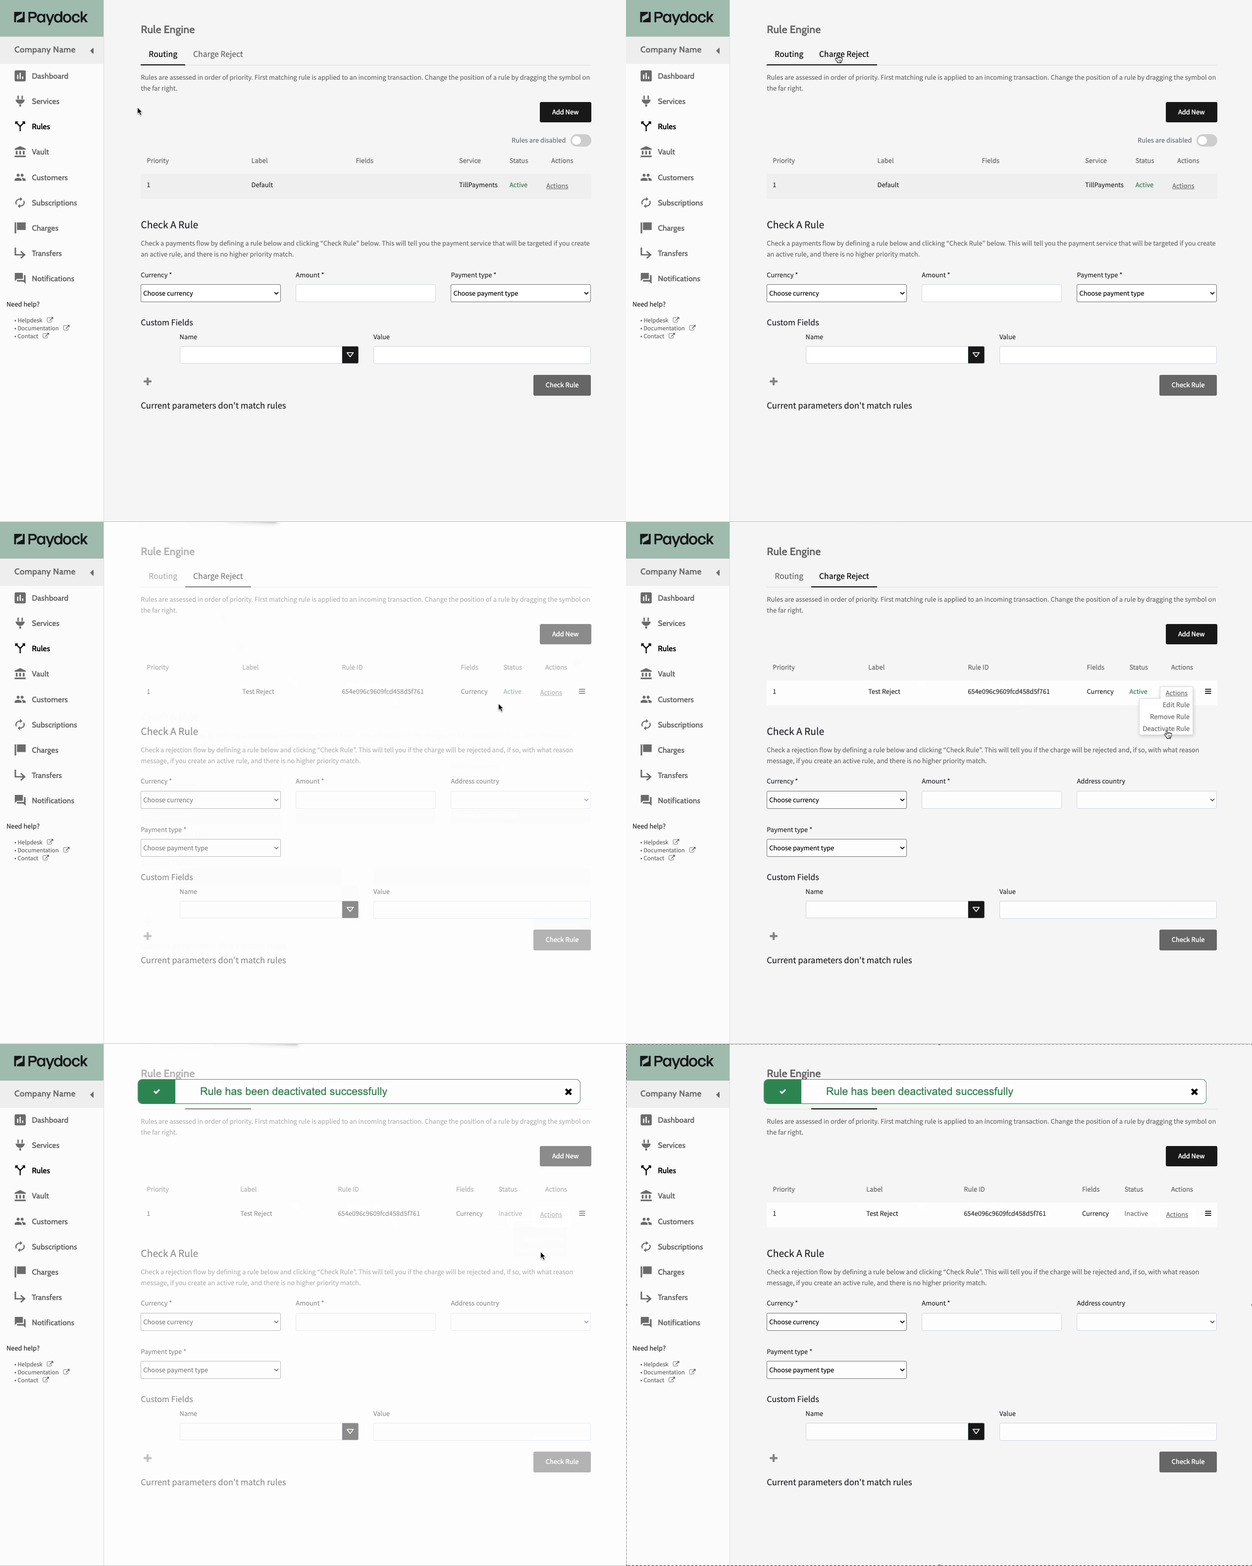
To deactivate an existing Rule:
- Go to Rules > Routing or Charge Reject.
- Click on the Actions > Deactivate Rule for the specified Rule.
Note: (for Routing) Deactivate all Routing Rules by clicking on the Rules are enabled toggle in the upper right corner.

Remove Rules
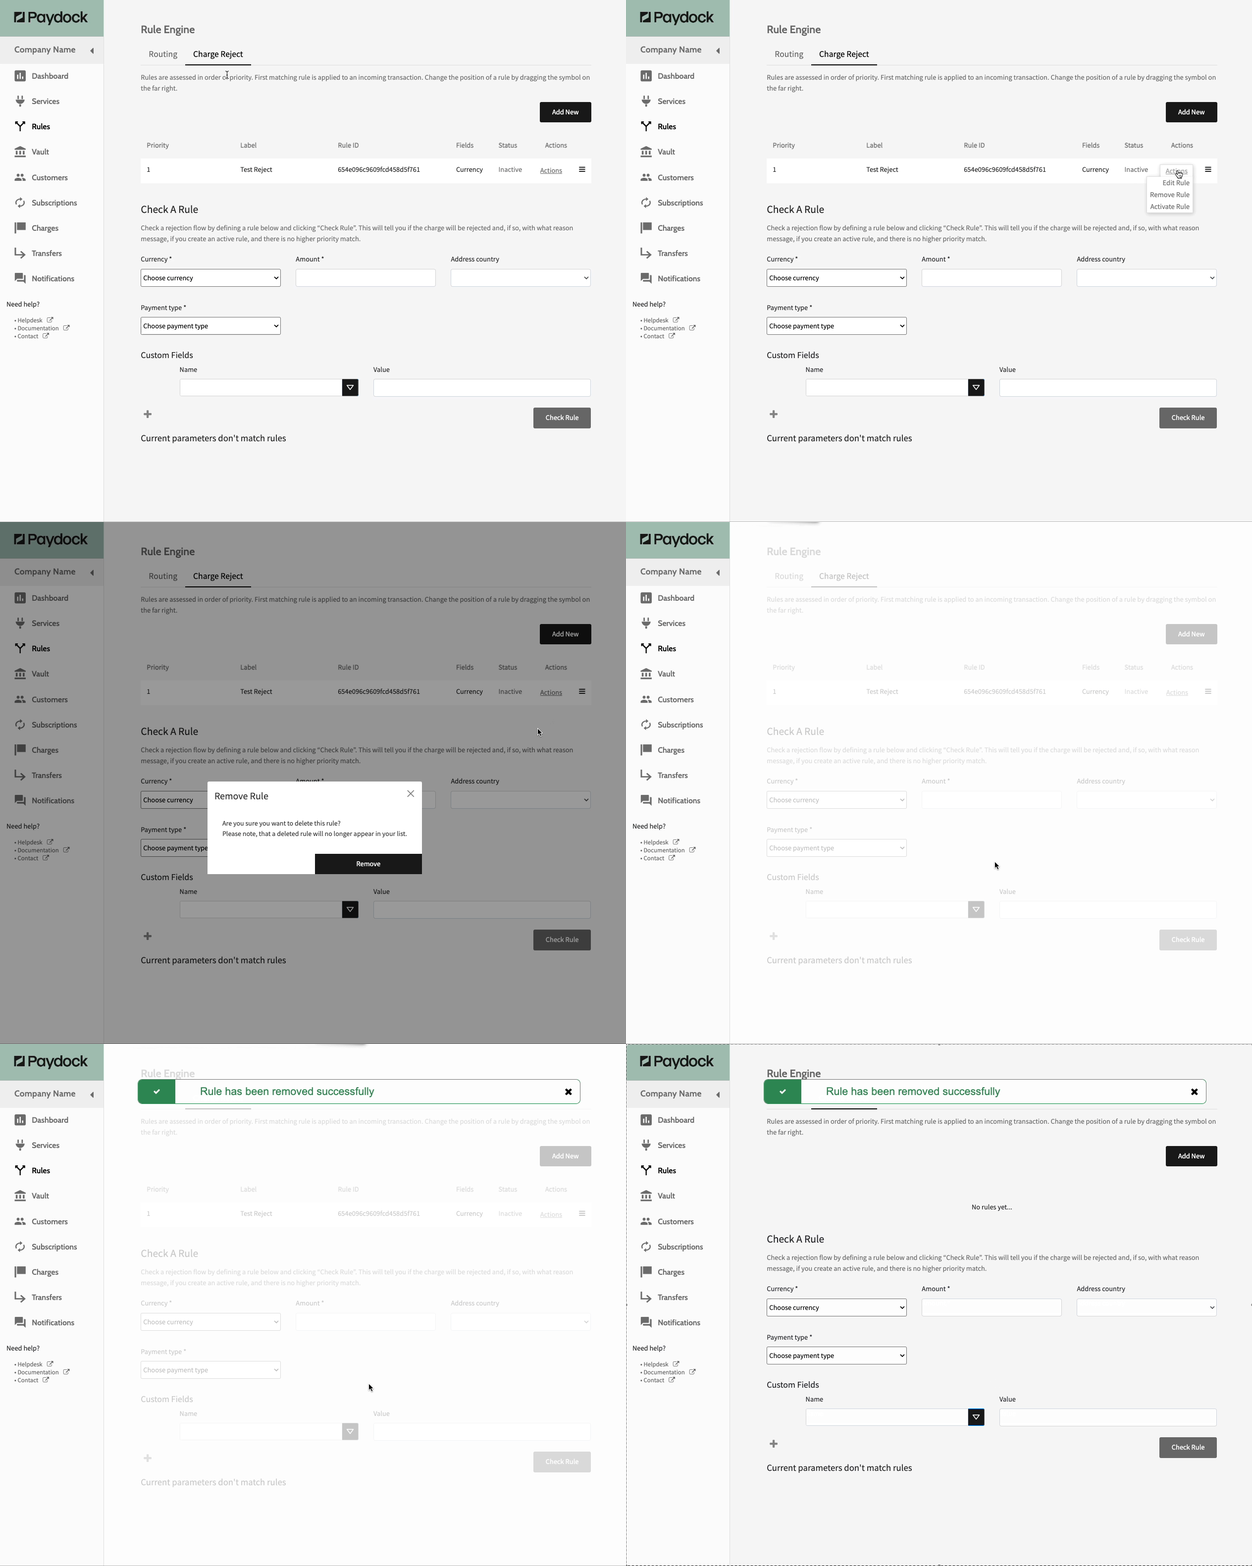
To permanently remove a Rule:
- Go to Rules > Routing or Charge Reject > Actions > Remove the specified Rule.
- Confirm with Remove.
