Add New Notifications
Notifications inform you of all the activity on your account in real-time. Notifications can be delivered by Webhook, email or SMS and are customisable based on the Customer and a range of other parameters. For example, send receipts or alerts and trigger other business processes, such as shipping or correspondence.
To configure a new Notification:
- Go to Notifications > Add New.
- Select the Notification type:
- Choose an existing Template or add a new one.
- Fill in the Payload Destination (receiver's email address). Or click on Payer's email to pull the Payer's email address into the Notification.
- Insert the details From (sender's email) and Subject (email's title).
- View the Template on the right-hand side. Click on Edit Template to update it.
SMS
- Choose an existing Template or add a new one.
- Fill in the Payload Destination (receiver's phone number). Or click on Payer phone to pull the Payer's phone into the Notification.
- View the Template on the right-hand side. Click on Edit Template to update it.
-
Webhook
- Choose an existing Template, add a new one or don't select a template.
- If you mark the option Pass Transaction Payload, a Notification will be sent only for this particular event for the Transaction, not for every event.
- Fill in the Payload Destination (receiver's URL address).
- Select the specific service from the User Auth drop-down menu.
- For Sandbox environment: You can use webhook.site as a webhook receiver.

3. Click Add Notification.
Test Notifications
To test a Notification:
- Go to Notifications > Notifications > Test.
Resend Notifications
To resend a Notification:
- Go to Notifications > History > Resend for the specified Notification. You can use the filter option or browse the list.


Remove Notifications
To remove a Notification:
- Go to Notifications > Notifications > Remove.
- Confirm with Delete.
OR
- Go to Notifications > History > Actions > Remove for the specified Notification. You can use the filter option or browse the list.
- Confirm with OK.
Notification History
To review the history of sent Notifications:
- Go to Notifications> History > Actions > See Details for the specified Notification. You can use the filter option or browse the list.

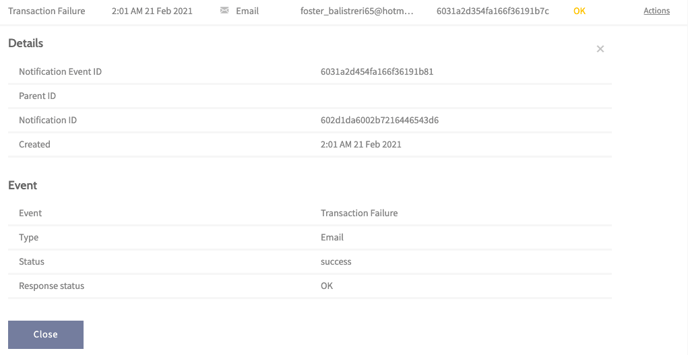
Here are the Notification's key parameters:
- Notification Event ID - the Event ID of the Notification.
- Parent ID - the Parent ID of the Notification. For a re-sent Notification, it will show the ID of the Initial Notification. For an Initial Notification, the value will be blank.
- Notification ID - the ID of the Notification.
- Created - the time and date of creation of the Notification.
- Event - the name of the Event (e.g. Transaction Success or Subscription Failed).
- Type - the type of Notification (Email, SMS or Webhook).
- Status - the status of the Notification (e.g. Success or Failure).
- Response status - the status of the network response (e.g. OK or 404).