Fraud Management
How to Add Fraud Checks, and connect them to new and existing charges.
Add new Fraud Check
Fraud management is identifying and preventing potential fraudulent actions toward a business or its customers. Fraud checks review transaction activities, users, and accounts to evade fraudulent behaviour. You can gather fraud data without triggering a payment transaction. Then, based on the check results, decide on the demand and time of adding a charge.
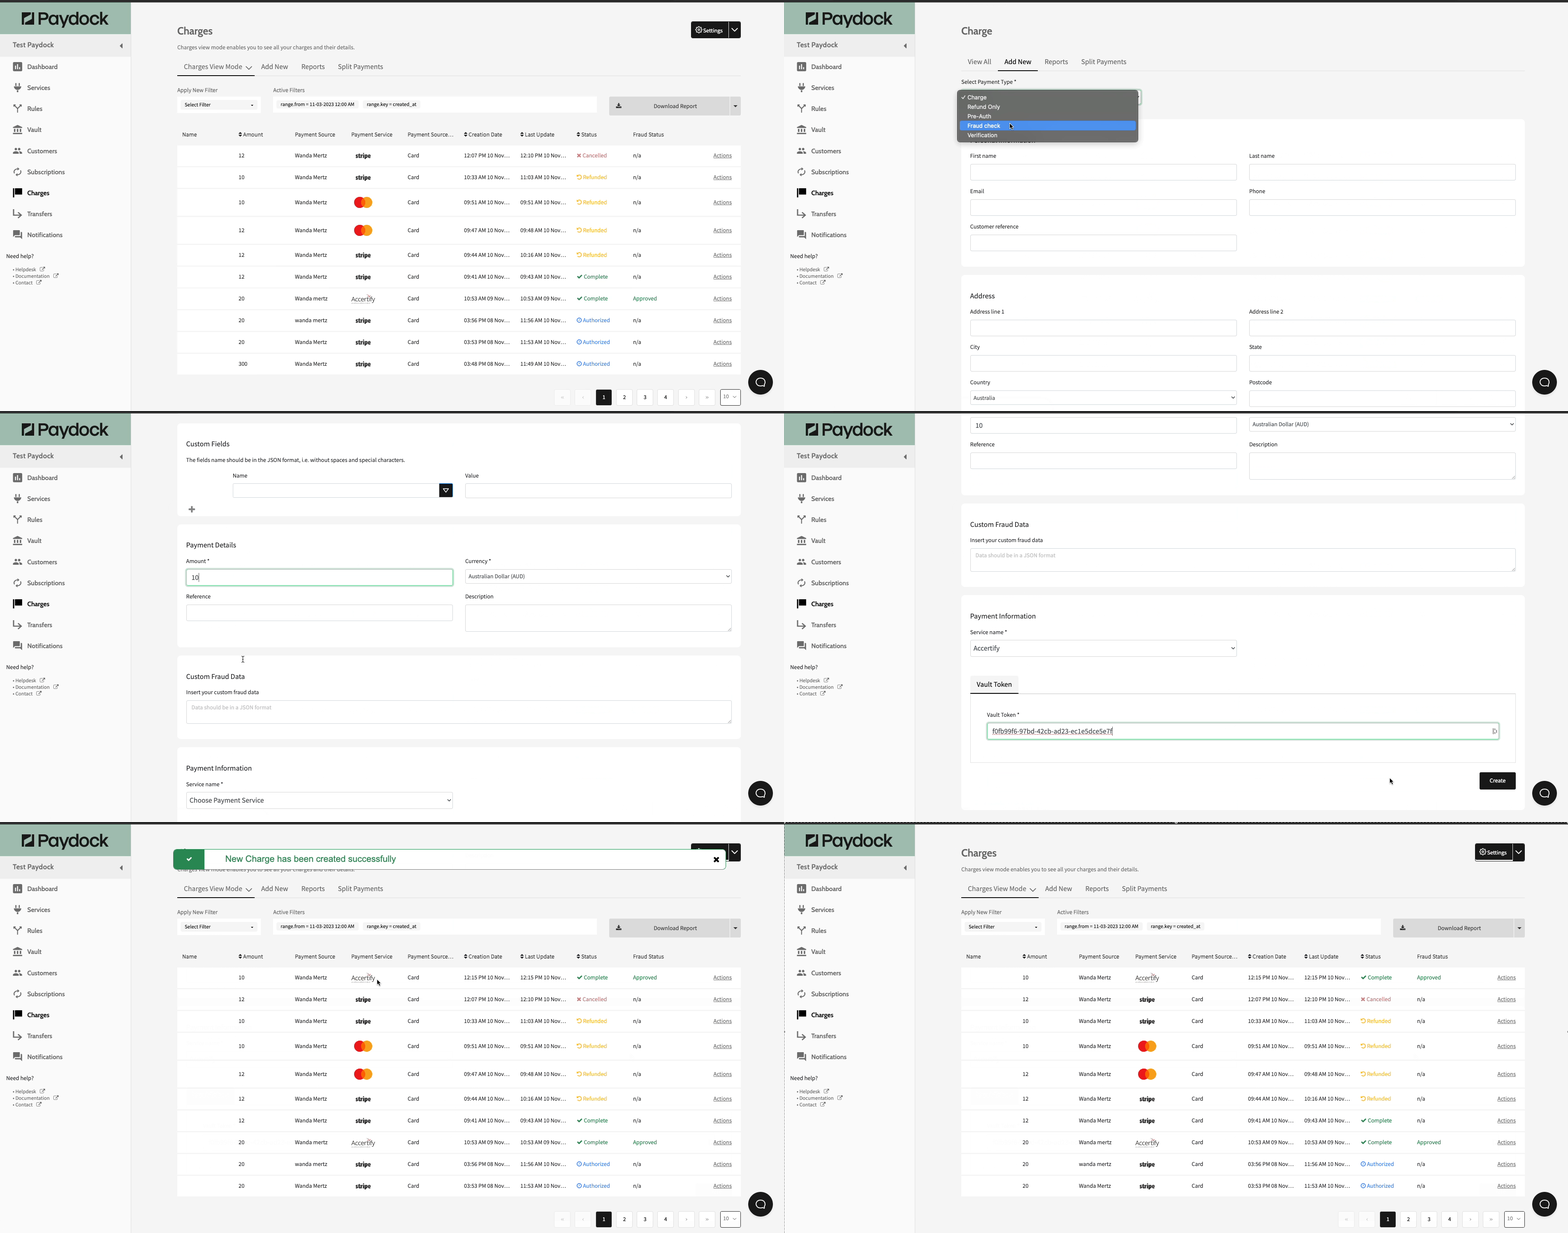
- Go to Charges > Add New.
- Under the Select Payment type’ drop-down list, select Fraud Check.
- Complete the Customer’s Personal Information, Address, and Payment Details.
- Under Payment Information, choose Accertify for Service Name and insert Vault Token.
- Under Custom Fraud Data, you have the option to insert browser fraud data obtained from the browserDetails variable.**
- Click Create.


**Custom Fraud Data example

Note: Fraud Check is only available for Accertify and works with Vault Tokens.
Connect Fraud Check to new Charges
To connect a standalone Fraud transaction to a new Charge:
- Go to Charges > Actions > View Logs for the specified Fraud Charge. You can use the filter option or browse the list.
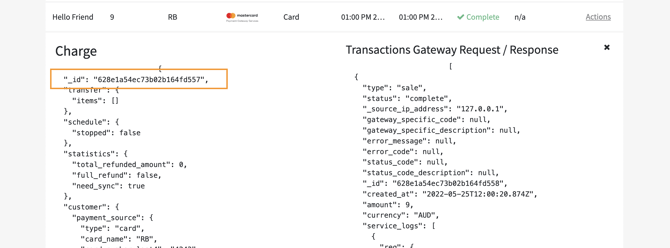
- Under the Charge details, copy the “id_”.
- Perform the steps to Add a new Charge, explained here.
- Under the Fraud Information, insert the copied Fraud Charge ID.
- Click Create.
Note: The initial Fraud Charge will remain intact.
Connect Fraud Check to existing Charges
To connect a standalone Fraud transaction to a complete Charge:
- Go to Charges > Actions > View Logs for the specified Charge. You can use the filter option or browse the list.
- Under the Charge details, copy the “_id”.
- Go to Charges > Actions > Connect for the specified Fraud transaction. You can use the filter option or browse the list.
- Insert the copied Charge ID.
- Click Connect.
Note: The initial Fraud Charge will remain intact.

How to enable Async response from Accertify
Pre-requisites:
- Login to the Paydock Dashboard
- Connect Accertify as a fraud service in any mode
- Flypay Gateway service ID available
Steps:
- Go to The services page
-
Navigate to the ‘Fraud Services’ Service group:

- From the list, find your Accertify Service using the service name and click on the Actions button on the right
- Click on ‘Get link’. A popup will appear if you are setting up the Webhook for the first time
- Copy both the Accertify Webhook link and Access token and paste this into a notepad
- In the webhook link, replace the token header parameter at the end with the Access token provided in the box above. Note: Service ID and Access token will differ in the actual webhook link
- This webhook link can now be shared with Accertify side to be configured at their end. Once configured, Async responses for In Review Fraud requests will start working.
