Add Fee Profiles and Assign them to Companies
Fee profiles represent a pricing scheme that automatically applies fees to your merchants. Choose the fee type, amount, and conditions for the profile, with the possibility to create multiple profiles for different commercial arrangements. Once the new fee profile is released or active, link it to your company.
To add a Fee profile:
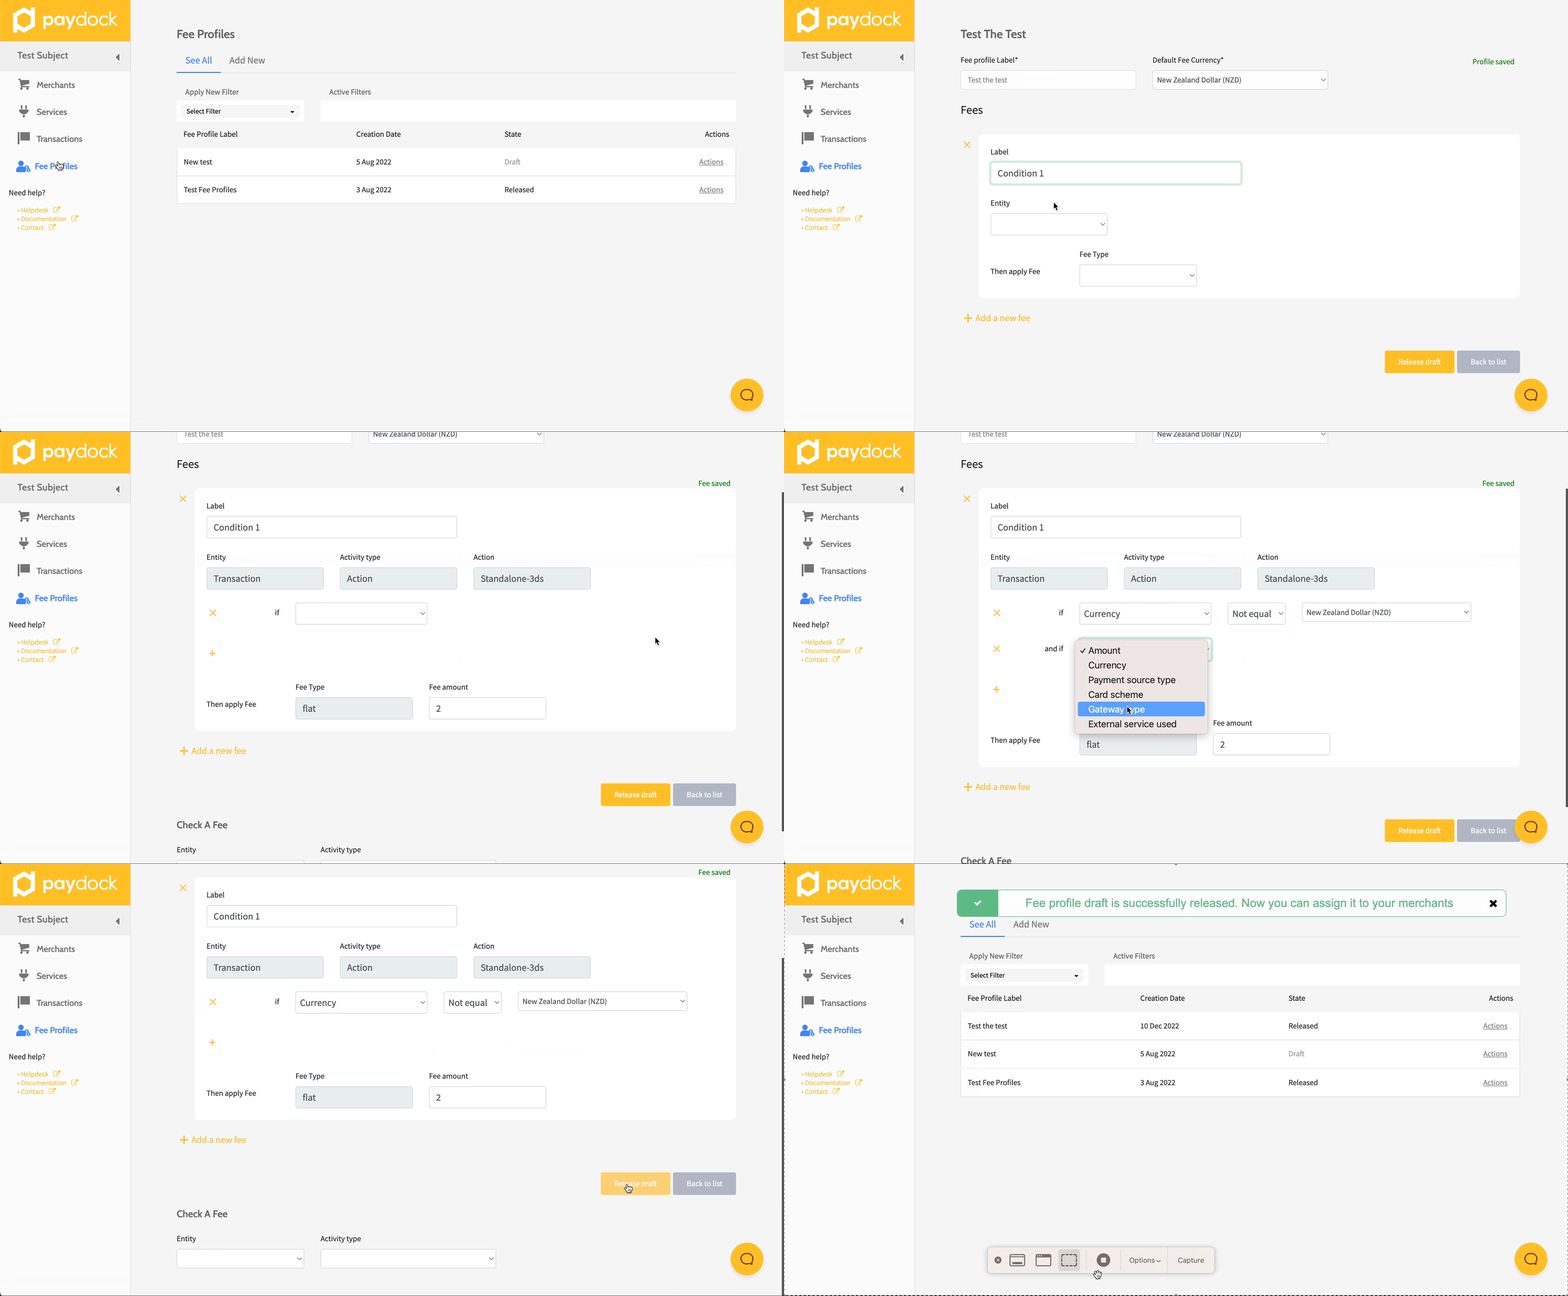
- Go to Fee Profiles > Add New.
- Fill in the profile name under Fee Profile Label and choose the profile currency from the Default Fee Currency drop-down list.
- The Fee Profile has been created. Then, click on the ‘+’ sign Add a New Fee.
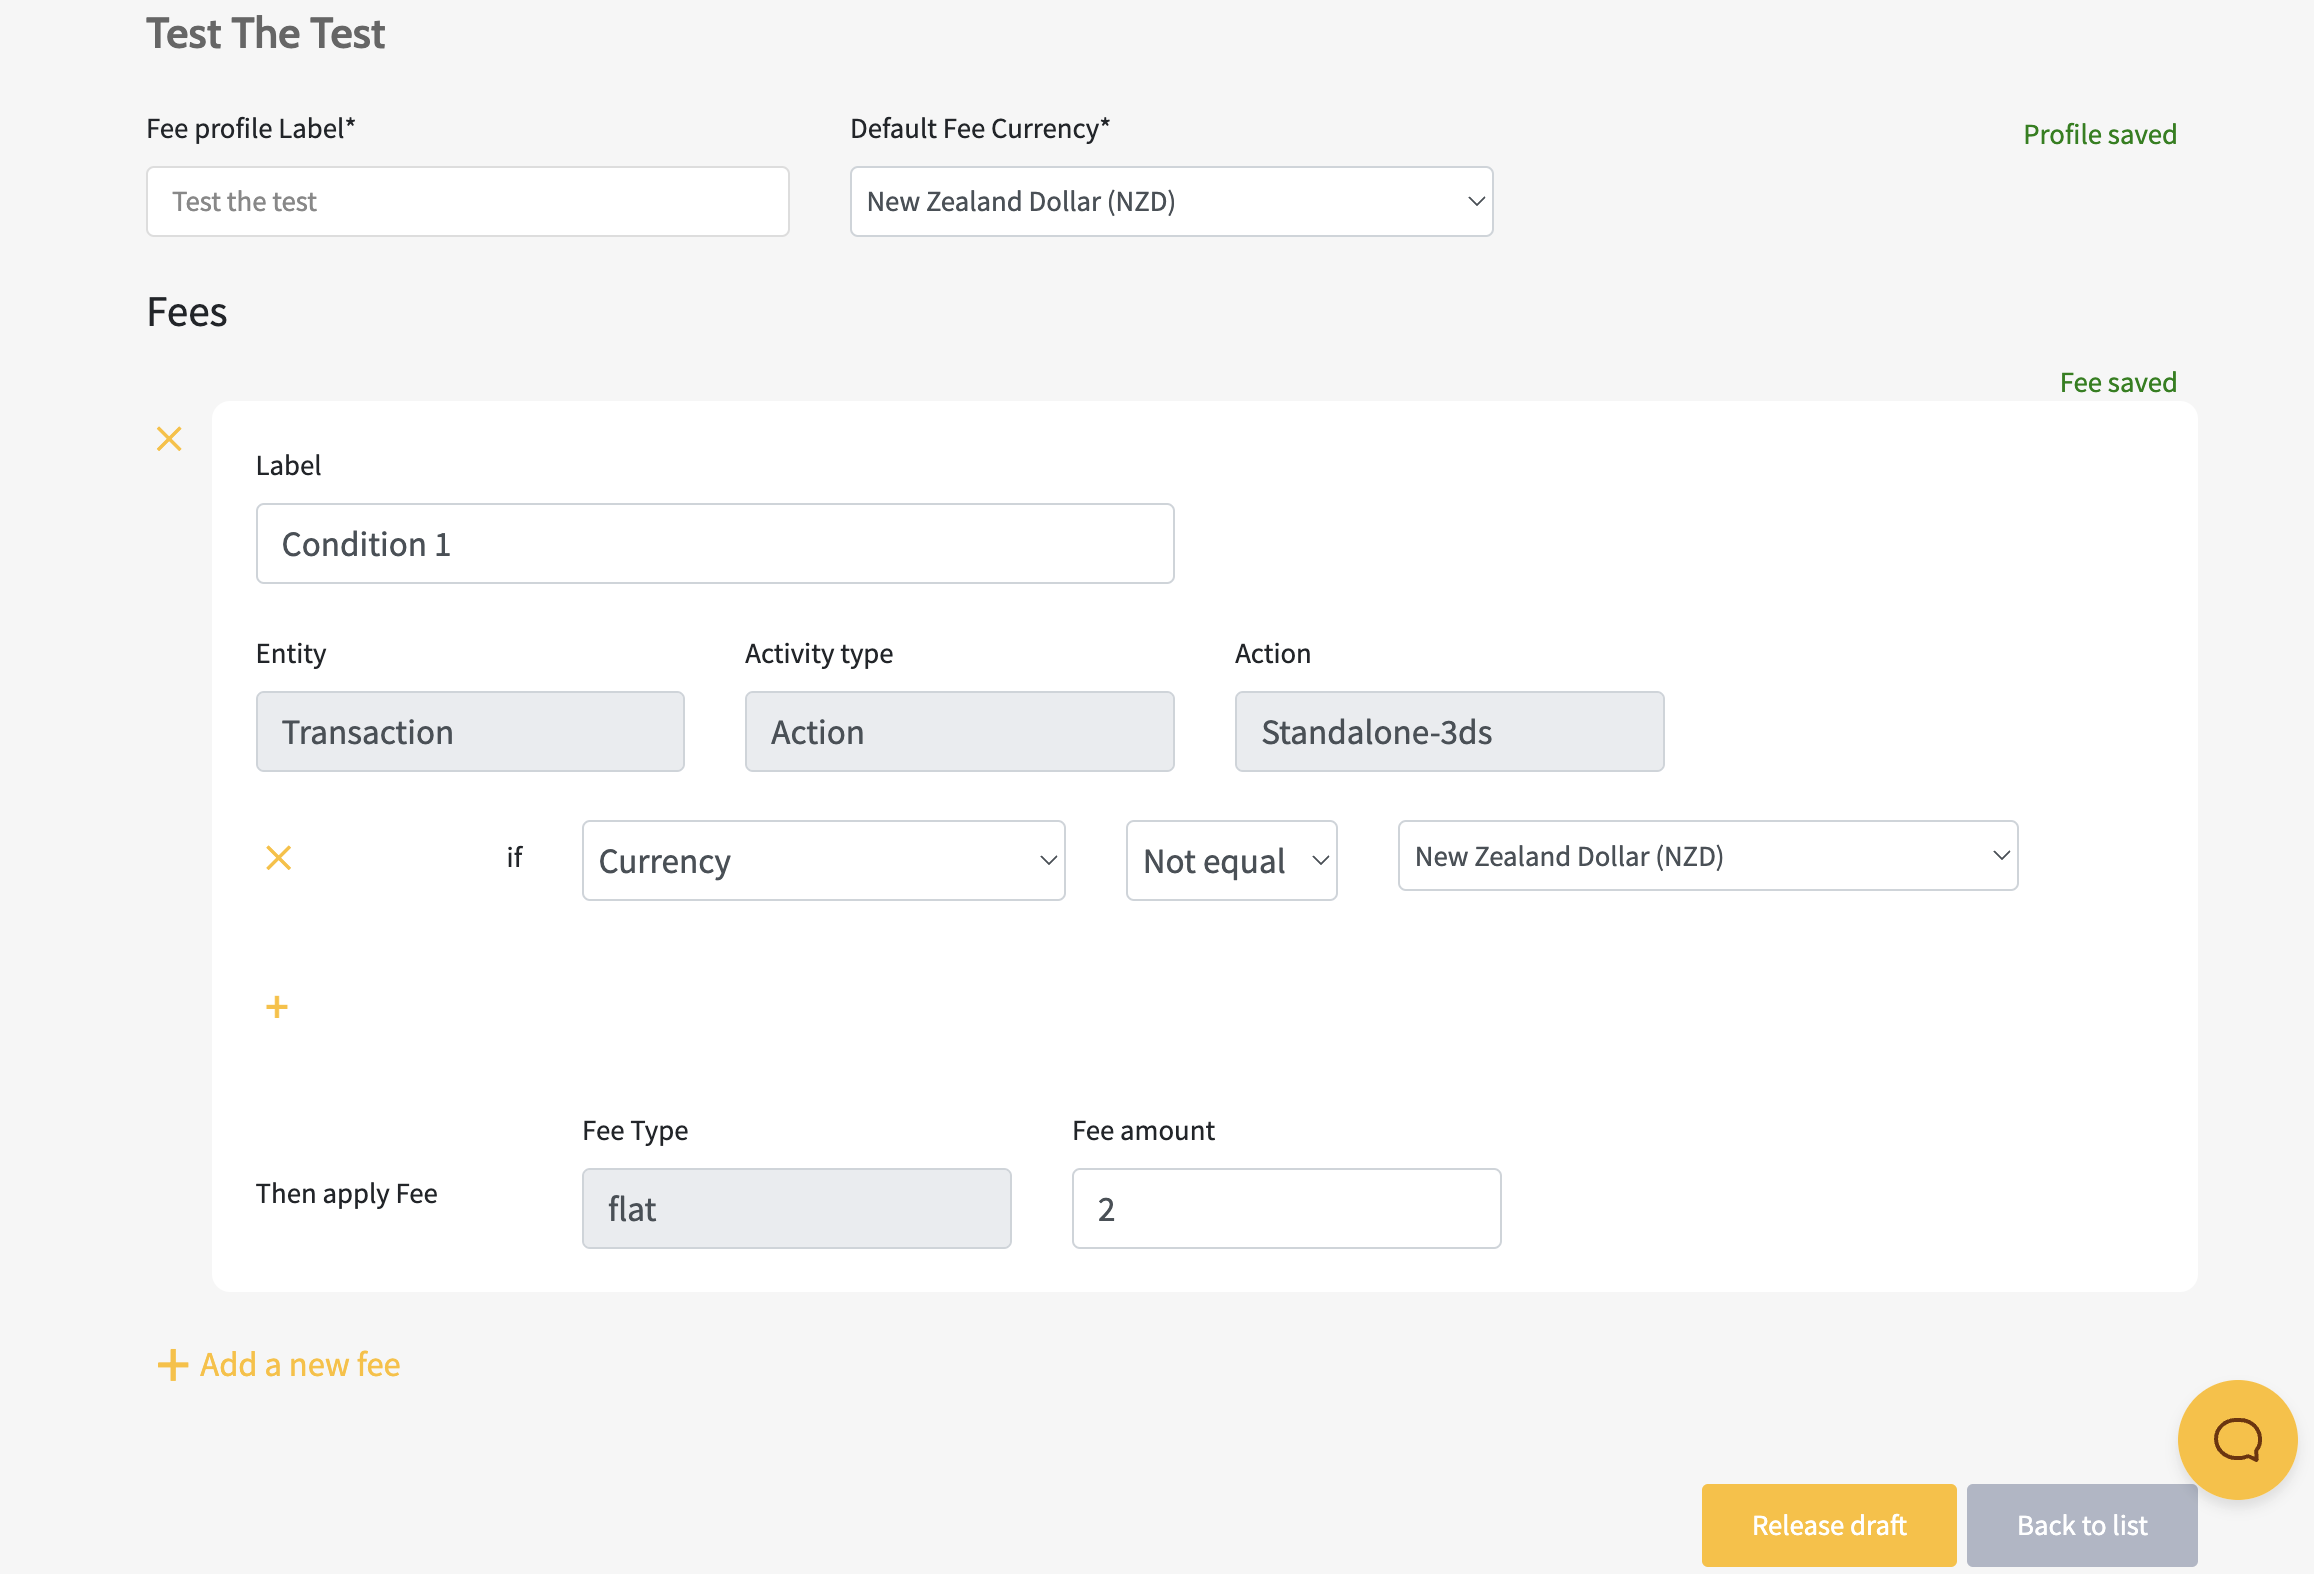
- Populate the name for the specific fee under Label and select an Entity.
- Select the Activity type and Action to generate the fee.
- Choose the Fee Type and fill in the Fee amount. Insert the Percent of amount for the percent of percent Fee amount option.
- To set up more than one fee under the same profile, press the ‘+’ sign Add a New Fee.
- To remove a fee under the same profile, press the ‘x’ sign.
- To set up more detailed conditions for the specific fee, click on Add Condition.
- To remove a condition under the same profile, press the ‘x’ sign.
- Save as a draft by pressing Back to list.
- Add the new fee profile by pressing Release draft.


